

Contrary to what you may have read in Ripley’s Believe It Or Not, we humans are not very combustible. We are mostly water. With the exception of our hair, there is not much on us that is predisposed to going up in flames. What is flammable is fuel. Once you know this, you know that the main thing you need to do to protect yourself while fire dancing — Use fuel safely! In this course, we will learn how to do that, as well as what to wear and what not to wear, the qualities of various fuels, and some first aid tips to know in the event we, or someone around us, gets a burn.
I encourage you to burn safely. You are protecting not only you and the people around you but every fire dancer everywhere. One bad accident could affect of all our ability to create art with fire. Be responsible. Be present. Be safe.
The following are some basics for all fire performers, whether they are first time burners or performers with years of experience.
I. QUALITIES OF FIRE:
– Fire always burns from the bottom up. The flame from a burning hoop held in the vertical plane can come up and burn through the hoop. Hold a hoop horizontally if it is not moving. The flame from a burning poi rises up toward the hands. Keep the poi gently swaying to keep the fire away from the hands. The flame from a fan held straight down will come up toward the knuckles. Instead, hold the flame part of the fan down and a bit out in front to create the illusion of holding it straight down. The best way to extinguish a flame is always from the bottom, not the top.
– Fire requires oxygen to burn. If you spin faster, you give the flame more oxygen so your burn time will be less. If you spin slower, you give the flame less oxygen so your burn lasts longer. If you have a flame on your clothing and you pat at it frantically, it will feed oxygen to the flame and make matters worse. Instead, cup your hand over the fire, push downward, and smother the fire. If you have a fire in your metal fuel bucket, put the lid back on the fuel bucket, deprive the fire of oxygen, and the fire will go out. Fire can suck the oxygen out of a room quickly. People in house fires sometimes die of asphyxiation before smoke inhalation. If a fire is on the other side of a door, do not open that door and feed the fire oxygen. Fire blankets smother fires by depriving them of oxygen.
– Fire is loud and it’s even louder when you give it oxygen (i.e., when your tool is spinning.)
– Fire is bright and looking into it can leave you temporarily blinded. Instead look out over it.
– Fire is lugubrious. We move faster than fire burning at the end of a wick, therefore, if you are using a fire sword (or fan or staff), do not hold your tool flat and then push forward (like you’re stabbing while fencing) because even though the tool moves forward, the fire stays where it is for a moment before it catches up to the tool. It is better to move backward with fire, away from it, than forward with fire, into it.
Review:
-
Fire burns up
-
Fire requires oxygen
-
Never pat fire
-
Always smother fire
-
The wick and the fire move at different speeds
II. PREPARING TO BURN
-
Prepare Yourself
-
Prepare Your Tools
-
Prepare Your Fuel
-
Choose the Right Environment
-
for spinning,
-
for spinning off and
-
for your fuel dump
-
I.a PREPARING YOURSELF
Presence:
-
Never light up alone.
-
Never perform or practice with lit tools while under the influence of any substance, including prescription medications, which impair concentration, coordination or judgment.
-
Do not engage in firedance if you are in any condition other than fully awake, aware, and capable. More than one firedancer I know who burned themselves did so because they were tired or distracted by something in their life. Be present. Be alert!
-
Know that spinning fire is risky. Do what you can to minimize the risk but know that you are taking a risk. Exercise caution, make good choices, and practice good risk management.
I.b WHAT TO EXPECT
:
– Fire can be disorienting. It’s very hot and the roar of the fire is very loud. Be calm and breathe. It may feel closer to you than it is.
– Remember fire burns from the bottom up so don’t burn yourself or your tool by holding it over the flame.
– Do not stare directly at the flame. Instead, fix your gaze on an object outside the fire. If you do look into the fire and become blinded, avoid turning, soften your knees, look out over the fire and allow your eyes to readjust.
– Do not be intimidated by the train-like sound of the fire.
– Practice extensively with an unlit fire tool to become familiar with the tool before lighting up. This is especially true for hoopers! Too many hoopers never practice with their unlit hoop again after that first burn.
– Practice new moves with an unlit tool until you are proficient with that move.
– Practice controlled breathing so you are exhaling, not inhaling, if the fire is close to the face. This protects you from breathing in smoke and fuel-related chemicals as well as fire. When hooping around the neck, for example, breathe in before bringing the hoop to the neck and then hold the breath until the hoop moves back down or is lifted off the body. We aware when fire is coming beneath the nose or mouth, always remembering the fire rises up!
I.c DRESS FOR SAFETY AND SUCCESS:
– Reminder: We are mostly water. The least flammable of all fibers is our own living skin. The only part of us that is highly flammable is our hair, which is made of dead cells. Exposed skin is unlikely to burn as long as we use fuel safely and do not get fuel on it or touch a hot piece of metal so bare skin, as long as there is no exposed hair, is one of the safer ways to burn. But, if you are uncomfortable with naked fire spinning, read on:
– Choose Natural Fibers. Leather, wool, silk, cotton, hemp and bamboo all have natural fire retardant qualities. They, like us, are mostly water. The thicker the fabric, the more fire retardant it is. For example, cotton jeans are more fire retardant than a cotton tee shirt. Avoid frayed fabrics (like cut-off jean shorts, for example) as hanging threads can create a wick that allows fire to catch and ignite the larger fabric.
– Avoid non-natural fibers. Polyester, acetate, nylon, spandex, rayon and any other non-natural fiber is not only slippery (which is important for hoopers and people who use contact tools), they are made of petroleum products. These won’t necessarily go up in flames (though they can, especially if you transfer fuel onto them) but they can melt on your skin. (Think hot melted cheese!) Avoid blended fibers too but if you choose to wear a blended fiber, know that a blend with 1-5% spandex is safer than a blend that is 50% spandex.When doing your risk assessment, choose accordingly.
– Always check the label on your clothes! Velvet can be made out of natural or petroleum-based fibers. Velour is generally cotton but not always. Taffeta is usually silk but not always. Suede is sometimes leather but sometimes it’s not. Always check the label!
– Thickness and Weave matter! The way a fabric is made affects how it burns. Heavy, tight weaves, such as knits, are less flammable than loose open weaves, such as lace and gauze. Cotton jeans are way less flammable than a cotton t-shirt because of the thickness and the weave. With velvets, knit velvet is better than cut velvet, which is better than crushed velvet. This is because crushed velvet has a higher pile, which means more surface area is exposed to air, which equals greater flammability. Think of each piece of pile as a potential wick.
– Do not spin fire in clothing that has been treated with fabric softener dryer sheets. In addition to being the largest source of indoor air pollution in the western world, the active ingredient in dryer sheets is beef tallow (or fat), which is flammable.
– Clothing may be treated with fire retardant chemicals to reduce flammability. This has mixed results and the creation of fire retardant chemicals is very bad for the environment and it’s bad for you too. These chemicals also wash out when laundered so treatment must be done again and again. I recommend going the natural fiber route.
– Other considerations: Avoid dangling sleeves, scarves or wide bell-bottom pants. These can wrap around a wick, especially when using a hoop and executing a step- or jump-through. Wicks can also tangle in coin belts, dangles from bra tops, suspenders, and hair sticks.
_______________________________________________________________________
THE U.S. CONSUMER PRODUCT SAFETY COMMISSION tested fabrics for flammability. Here are their findings:
• Rayon takes just 3 seconds of exposure to fire to burst into flame.
• Thin cotton takes 4.8 seconds.
• Denim takes only 5 seconds but will burn longer due to the thickness of the material.
• Silk takes 7.6 seconds to burn.
• Thick cotton, linen and polyester take 9.2 seconds (but, again, polyester will actually melt on you before it burns.)’
• Wool and Leather take in excess of 15 seconds to ignite.
_______________________________________________________________________
Clearly clothing requires a fairly long exposure to flame to catch on fire, however it is rarely exposure to flame that causes clothes to ignite. The biggest risk of clothing fire comes from transferring fuel to clothing. Care when dipping, spinning off, and transporting fuel greatly reduces the risk of fuel transfer and will be discussed later.
I.d HAIR:
– Hair is made up of dead cells and is extremely flammable. Secure long hair so that it is not free flowing. Do not wear hair spray or alcohol based hair products, which are also flammable.
– Spray hair with water until slightly moist or cover it with a cotton, leather or wool hat or bandana.
– I often wear wigs or hairpieces that are not made of human hair over my hair. These may melt if exposed to flame but, if so, you just cut out the melted places or throw them away and buy new ones. It is very important that your hairpieces are not made from human hair! (Special Note: When using hair pieces, anchor them securely with bobby pins. The last thing you need while spinning fire is for your wig to fall down over your eyes!)
I.e FIRE SAFETY EQUIPMENT:
– FIRE SAFETY PERSON. This individual literally has your back when you are spinning fire. Ideally have one fire safety per spinner and ensure each safety knows which individual they are safetying for.
– FIRE BLANKET. Every fire spinner should have their own Fire Blanket that is free of tears, frays or hanging threads. I recommend a wool blanket from an army/navy surplus. These are naturally fire retardant, inexpensive and last for years. You can cut one blanket into 6-8 fire blankets. Another alternative is a fire blanket made of Duvetyne. These are more reliable than blankets that are simply treated with Duvetyne, which washes off or fades with time.. If you have access to a theater that is going out of business, theater curtains make great fire blankets! They’re often red so you don’t lose them in the dark and they are almost always made of Duvetyne to resist burning. An emergency alternative is using a moistened 100% cotton, bath-sized, towel. If you use a towel, be prepared to reapply water to it after every time you extinguish a wick.
– ABC FIRE EXTINGUISHER. Water extinguishers are not suitable for most bucket fires as they only spread the fuel. An ABC extinguisher is great for a bucket fire but not good to use on a person because they contain ammonium phosphate. People should always be extinguished by using a fire blanket.
– CELL PHONE. Have a charged cell phone for dialing 9-1-1 in case of an emergency, as well as the address and clear directions to the place where you are spinning fire.
– FIRST AID KIT. (See last section of this pamphlet for stocking your First Aid Kit)
_______________________________________________________________________
HOW TO USE AN EXTINGUISHER:
-
Remember – Extinguishers are for bucket fires not people!
-
Pull the pin on the fire extinguisher.
-
Stand several feet from the fire, depress the handle and sweep back and forth towards the base of the fire. Note: Do not walk on an area that has been “extinguished” in case the fire re-ignites or the extinguisher runs out!
-
You can usually expect only about 10 full seconds of extinguishing power on a typical unit and this could be significantly less if the extinguisher was not properly maintained or partially discharged.
-
Direct the extinguisher at the base of the flames until the fire is completely out. Aim for the bottom of the flame, not the top
-
Recharge a discharged extinguisher after use. If you discharge an extinguisher (even a tiny bit) or pull the pin for any reason, refill it or replace it. The last thing you need when you need an extinguisher is one that doesn’t work.
_______________________________________________________________________
PRIOR TO BURNING
I. SELECT A FIRE PERFORMANCE AREA, A FUEL DUMP, AND A SPIN-OFF AREA
a. FIRE PERFORMANCE AREA:
– Remain at least 10 feet away from the audience or other performers.
– Check the outdoor performance area for holes, flammable objects such as brown grass, fallen leaves, straw, hay, pine straw, low hanging objects such as overhead blankets, lights or decorations, things you can trip over such as toys or furniture, or other potential dangers. Know that dead leaves still in trees such as oak leaves in fall can ignite above you and carry the flame up to higher limbs.Check the performance area carefully, looking below, behind, and above.
– If you plan to firedance indoors, check the performance area for flammable curtains, ceiling tiles or decorations. Again, check below, behind, and above. Move all potentially flammable material away from the performance area. Remember that some flooring may also be flammable and act accordingly. Fuel and spin off excess fuel out of doors. Choose a fuel appropriate for indoors spinning – one that is not slippery and does not create a lot of fumes or smoke. (White gas a.k.a. Camping Fuel is best.)
– Indoor venues must be well ventilated with unlocked exits nearby and clearly marked. Check for yourself to insure emergency exits are unlocked. Do not take someone’s word for it.
b. FUEL DUMP OR FUELING AREA:
– Fueling Areas should always be out of doors.
– Clearly mark the Fueling Area and keep onlookers at least 30 feet away.
– Do not allow smoking within 30 feet of the Fueling Area.
– The Fuel Area should be manned by a Safety and equipped with a fire blanket and an ABC Fire Extinguisher.
– When possible, place the Fuel Area behind a hard wall, rocks or other traffic impediment with a clear corridor leading from the Fuel Area to the Fire Performance Area.
– Do not transport wet wicks through a crowd. Either use an escort to prevent people bumping into you or cover soaked wicks with sealed sandwich bags until ready for use. (This also prevents evaporation.)
c. SPIN-OFF AREA
– The Spin-Off area should be away from the Fire Performance Area and out of the flow of traffic. Fuel is slippery. You don’t want to pollute the performance area or where bystanders are walking or smoking.
II. CHECK EQUIPMENT:
– Wicks should be attached utilizing a hard limiting method such as a locking nut. Avoid glues, knots and non-locking nuts.
– Wicks should be constructed of fire-proof material such as Kevlar. Knotted cotton cloth is not an acceptable wick and may result in complete or partial loss during use. When using rope dart, even the rope should be made of kevlar to prevent burning from fuel transfer.
– Before fueling, exercise special care to insure all nuts, screws and wires are tight and secure at every connection.
– Any threads from frayed wick should be trimmed using scissors.
– Check equipment prior to every burn, every time. One burn is all it takes for a nut, screw or wire to become loose.
III. ASSIGN ONE SAFETY TO EACH SPINNER:
– Ensure Safeties are trained and capable, present safe and sober, dressed appropriately, have a fire blanket, and know which spinner they are watching. (See “Safeties” section.)
IV. DIPPING METHODS AND FUELING:
– Store dipping fuel in a metal container with a lid. Gallon or quart-sized paint cans are excellent and can be purchased at most hardware stores.
– Store fuel for pouring or spraying onto wicks in a metal fuel container with resealing lid. Coleman fuel bottles are excellent for this and can be purchased at most camping stores. Do not use glass!
– Dip the wick straight down and pull straight up when immersing the wick in fuel so you do not catch on the lip and pull the fuel bucket over.
– Fans may be dipped two wicks at a time to speed fueling. Simply hold the fans together in ‘prayer position’ before dipping.
– Hoops: Count the number of wicks on the the hoop. Turn the hoop to the right after each dip to ensure you don’t miss a wick because you reversed direction.
– Staffs: Dip the second end of the staff at an angle so excess fuel from the first wick does not fall down on you or the staff. Wipe excess from the staff or your hands with a cloth. Be careful not to pull over the fuel bucket by catching on the lip of the top. (Do not use the chemical glove method if you intend to do a fire spin-off by rolling the staff between the hands and away from you.)
– Poi: Dip poi, use chemical glove and then place poi in spin-off bucket.
– Reseal the lid immediately after fueling wicks and prior to lighting up. This prevents the possibility of a fire in your stored fuel as well as saves fuel that might otherwise get kicked over or evaporate.
– After fueling, allow excess fuel to drip back into the fuel bucket or into another bucket to be returned to the original fuel container prior to lighting up.
– I recommend wearing a chemical glove and squeezing excess fuel back into your fuel bucket. I use the “milking technique”, squeezing from top to bottom, similar to squeezing water out of long hair.
– To remove the chemical glove without getting fuel on your hands, buy oversize gloves that slide off easily. Hold the top of the glove between the pointer finger and thumb and pull the glove away from you to remove it. Place it palm down on the ground only hand the back of the glove to slide it on and off. (Washing your chemical glove at the end of the evening will prolong its life.)
– Spinning Off: Even if you use a chemical glove, always spin off excess fuel prior to using your tool. Spin off in the Spin-Off Area, an area free of expected foot traffic and far from ignition sources. (Remember: Fuel is not only flammable it’s slippery!) Spin off a hoop by hand hooping to the side, spinning forward while walking forward so that any excess fuel drops behind you. Spin off a poi by spinning forward while walking forward. Always make sure no one is behind you before spinning off! Spin of a fire fan by using a whip-like motion to direct any excess to the front. Do not lift the hand higher than the head. Spin off a staff or baton after dipping the first wick and before dipping the second unless you plan to do a burn off by rolling the tool between the two palms.
– Wipe off any excess that lands on the hoop, staff or baton itself with a clean, dry cloth or paper towel. Do this after spinning off but prior to using the tool to reduce the risks of slipping and/or fuel transfer.
– Many people use plastic, sealing sandwich bags or other wick attachments to catch fuel during spin off instead of spinning excess fuel onto the ground.
IV.a. POURING FUELS:
– Pour fuel slowly so that it doesn’t glug and splash.
– Pour with the container as close to the receptacle as possible for less splash.
– Pour white gas from the can (such as Coleman’s Camping Fuel) with the can sideways but with the spout at the top instead of at the bottom to reduce splashing.
– If the container has a second ventilating hole, open this to help the fuel pour smoothly.
IV.b TRANSPORTING FUELS:
– A fuel’s original retail container is usually the best choice for storage and transport. With lamp oil, however, once the foil top has been pierced, the lid will no longer contain the fluid, which is best decanted into a sealed metal container.
– If the original container is too bulky or unavailable, then a sealed metal container is the best overall choice.
– Fuel should be kept out of direct sunlight, away from sparks or flame, and in a leak-proof, air-tight, sealed container.
– Prior to airline or bus travel, wicks should be burned dry, left to air and then covered with vapor limiting devices such as tightly sealed plastic bags. You cannot fly with fuel!
V. SAFETYING AND EXTINGUISHING TOOLS AND FIRE
Safety (or Spotter) Responsibilities and Techniques:
– Fire Safeties have the same clothing requirements as Fire Performers.
– The Safety must always keep a sharp eye on the fire artist while being aware of the audience as well to ensure no one walks into harm’s way. It is also the Safety’s responsibility to quickly extinguish a lost wick should such an accident occur.
– In the event of multiple spinners, the Safety can either choose to focus on one spinner or on a zone directly in front of them. Safeties should decide together how to manage more than one spinner.
– The Safety must have a fire blanket in their hands at all times. Not nearby. In their hands and ready to use.
– The Safety needs to be on their feet and ready to spring into action at a moment’s notice.
– The Safety needs to be present and aware, not engaged in conversation, on the phone or otherwise not fully present.
– If the Safety notices a flame on the fire performer, they are to shout clearly, “You’re on Fire!” and then state where the fire is located. (Example: Left front thigh) The performer will then stop, smoothly slide a slightly cupped palm (fingers together) down their body, over and past the flame extinguishing it. Always aim away from the face. Always extinguish a flame by pushing downward. Never pat at a flame. Oxygen feeds fire. Smother it with a cupped palm.
– If the performer is unsuccessful after three seconds or if the fire is on their back or head, the Safety should call loudly, “HOLD!” The performer must then stop all movement, hold the tool still and away from the body (with a hoop, hold it above your head in both hands) so the Safety can approach and smother the fire with the fire blanket.
– If a performer touches themselves with a flaming tool but there is no fuel/flame transfer, it can be helpful if the safety calls out, “You’re fine” to put the performer’s mind at ease and allow them to concentrate fully on their fire dance.
– Do not use an extinguisher on a person! Extinguishers are for bucket fires not people.
– In the event of a catastrophic fire accident, the Safety should call loudly, “Stop, Drop and Roll! Cover your face!” (NOTE: The exception to this rule is if the hands on are fire. Then do not let the burning person cover their face!)
– In the case of a catastrophic fire accident where the burning person does not have the presence of mind to stop, drop and roll, the Safety should tackle the burning person, covering the fire with the blanket and/or their body and roll with them until the fire is extinguished.
– The Safety must always have a telephone for calling 9-1-1 and clear directions to the location for emergency crews. Also, send someone to the street to direct emergency crews to the site.
– Safeties should also have quick access to a First Aid Kit. Ideally, the Safety should also be certified in CPR and emergency medicine.
Extinguishing Yourself:
– If the Safety shouts, “You’re on Fire!”, stop, locate the flame, and smoothly slide a slightly cupped palm (fingers together) down the body, over and then past the flame. Always aim down, away from the face.
– If the performer is unsuccessful after three seconds or if the fire is on their back or head, the Safety should call loudly, “HOLD!” The performer must then stop all movement, hold the tool still and away from the body (with a hoop, hold it above your head in both hands) so the Safety can approach and smother the fire with the fire blanket.
– In the event of a catastrophic fire accident, the performer should stop, drop and roll while covering the face. (NOTE: The only exception to this is if the hands are on fire. Then tuck the hands into the abdomen as you stop, drop and roll. Do not pat the fire, which will only fan the flames)
Extinguishing Tools:
– The most common and perhaps easiest way to extinguish a fire hoop is to simply spin it until the fire goes out.
– If the flame has reached a “smolder”, it is close to going out and may be able to be extinguished by blowing it out. To blow out a wick, always blow from the bottom of the wick, upward to avoid having fire close to the face.
– A wick can also be extinguished using a fire blanket. There are a number of ways to do this:
• The Safety can assist by placing a fire blanket on the ground for the Performer to lay the flaming wick upon. Fold the blanket over the wick, covering it completely and tightly between both hands (to avoid air pockets), and hold it this way for several seconds (at least four counts of “one-one-thousand”). This ensures the flame is fully extinguished. Opening a blanket too soon can feed oxygen to a dying flame and cause it to flare up again. Do not pat at flames, which only feeds fire. Smother it instead. If you’re using a fire hoop, rotate the hoop, extinguishing the wicks one at a time.
Remember, fire burns up. Extinguish flames from the bottom!
• Another method is for the Safety to approach while the Performer holds the tool still and at waist level so the Safety can methodically cover each wick from bottom to top with the fire blanket as described above. (NOTE: Fire Hoopers must exercise caution during this process and ensure the hoop does not rest against the small of the back, which can ignite clothing or hair.
Extinguishing Bucket Fires:
– Do not try to extinguish a bucket fire with water. Water will splash and spread burning fuel.
– If the bucket is still upright, you may choose to let the fire burn off or the fire may also be extinguished by replacing the metal lid on top of the bucket or otherwise depriving the fire of oxygen. Some creative folks keep their fuel bucket inside of a military trunk, which is metal and can be closed to deprive the fire of oxygen. This also makes a handy break so that people don’t accidentally kick fuel over.
– Use only an ABC Fire Extinguisher to extinguish a bucket fire.
– To use an ABC fire extinguisher, pull the pin, squeeze the handle and sweep the extinguisher back and forth at the BASE of the fire. (See: Page 5 for detailed instructions.)
– A fire blanket can also be used to extinguish a bucket fire if the fire has not spread. In the event that this is necessary, do not fan the flames. Cover the fire with the blanket and deprive it of oxygen until the flames go out.
A NOTE ABOUT FIRE BREATHING AND FIRE EATING
Fire Breathing – Fire Breathing and Fire Eating are often confused. Fire Eating is where lit fire tools are extinguished with the mouth. It is not good for the enamel of the teeth but not nearly as dangerous as Fire Breathing.
– Fire Breathing is where you put fuel in the mouth and blow it out in a small stream while adding to fire to make a huge burst of flame. Fire Breathing is the most dangerous of all fire arts. It can result in a wide variety of lethal fire accidents including burns to the face and body, burns to the lungs from inhaling fire, burns to other people, and a wide variety of cancers from holding fuel in the mouth, which is a porous mucus membrane that allows carcinogens to directly enter the bloodstream. It is also terrible for your teeth. I discourage people from fire breathing! It is not good for your long term health and it is dangerous to people around you. Most of the fire dancing deaths I know of come from fire breathing. And not just to the fire breather! Spectators have been killed and permanently disfigured from fire breathers. Think twice about fire breathing. You get one body and it has to last you a lifetime.
– If you must fire breathe, do not do it when it’s windy, rainy, or in any state other than present, safe, and sober. Apprentice under an expert to learn the safest strategies but know, breathing fire will never be truly safe.
– If you do inhale any fire, call for an ambulance immediately! They have tubes to intubate you if necessary so you can continue to breathe if your lungs shut down or your throat swells shut. If you go to the hospital and they try to release you, do not leave! Stay put for at least 12 hours. Fire Breathers have left the hospital only to find themselves at home when pneumonia set in. Refuse to leave! These are fourth-degree burns, or burns to the internal organs, and sometimes we have to educate medical personnel to help them understand the gravity of the situation.
– If you inhale or swallow any fuel, go to the hospital immediately. Pleurisy and/or pneumonia can cause life-long and life-threatening health issues.
– Fire Eating – This often involves putting a flame inside the mouth. Avoid holding a burning tool with the teeth. Sudden heat differences can crack and degrade the enamel on your teeth. It can also harm crowns and veneers. Licking the wick also exposes the body to unsafe chemicals and is not healthy.
PART II – FUELS:
– Fast Fuels vs. Slow Fuels: There are two major varieties of fuels used for fire performance: fast-burning fuels and slow-burning fuels. Fast fuels are often called “hot fuels” because they burn hotter, ignite more easily and create combustible vapors. Slow-burning fuels, or “cool fuels”, do not burn as hot or evaporate as fast. They result in longer burn times and, in my opinion, are often safer. Each fuel has its benefits and its drawbacks. Tailor your choice to the circumstance.
– Slow Fuels: Slow fuels are good for beginners. They’re less volatile and once they’ve begun burning, they burn cooler. Some slow fuels include Lamp Oil, Ultrapure Mineral Oil and Kerosene.
– If you held two wicks in front of you, one dipped in lamp oil (the slow fuel), one dipped in white gas (the fast fuel) and lit them, the one dipped in lamp oil would glow orange-red, it would burn a long time and, if you got a drop of burning fuel on you, the low temp would result in a lesser burn. The one dipped in white gas would burn faster, brighter, white (like a sparkler) and then go out quicker. If you got a burning drop on you, it would burn worse because it was hotter. The slow fuel would be smoky and leave soot on the wick because it’s heavier. The fast fuel burns up fast and clean, no smoke, no soot.
Lamp Oil or Ultrapure Mineral Oil: These fuels ignite slower, burn cooler and create a slow burning, yellow flame that burns for a very long time. They are less smoky, sooty and oxygen depleting than kerosene so they can be used indoors but they are more smoky than White Gas, which we will get to next. A potential danger is that they tend to coat flooring or even asphalt with droplets of fuel and can make for very slippery conditions. They also cannot be readily mopped up. (Though using Dawn dishwashing detergent works.) On the other hand, lamp oil is much safer for transport. It is less volatile and emits fewer vapors. It evaporates slower and lasts longer, both on the wick and in your fuel can. Wicks remain ready to light for over an hour after dipping, longer under the right conditions. The flame also lasts longer, is easier to extinguish and burns cooler, which is good news if transfer a drop to your skin! Many people, myself included, prefer the orange/yellow flame to the bright white of fast fuels. (Consider the difference between a campfire flame and a sparkler flame.) Finally, these fuels have a high flash point, which means it takes a fair amount of heat to make it burst into flame. A high flash point can be both a blessing and a curse. While it is harder to set a slow fuel on fire by mistake, it is also more difficult to light, especially in cold, damp and/or windy conditions.
Kerosene: This is the dirtiest and least desirable of the slow fuels though in some third world countries, it’s all that’s available. It’s also the least expensive. It has more impurities, is the smokiest, leaves a residue on tools and creates a lot of soot, air pollution, and a very strong odor. It consumes an extreme amount of oxygen when burned in enclosed spaces and is not safe for use indoors. The flames are a cool yellow and burn almost as long as lamp oil. It is highly flammable, extremely combustible and creates fumes that can also ignite.
– Fast fuels: Fast fuels burn brightly and cleanly, with no appreciable odor, smoke, or soot, (which is good news for keeping your costumes clean!) Because of their low flash point and high flammability, they are excellent for outdoor performances under windy, wet or cold conditions. They light quickly, readily, have a very bright white flame. They create noticeably bigger balls of fire than slow fuels, something to keep in mind when spinning close to the face such as when neck hooping. Due to high flammability and volatility, exercise extreme caution with open or exposed fuel. Naturally you should always keep flame and sparks away from your fuel dump but, because fast fuels emit vapors that are heavier than air and can travel long distances to a source of ignition, it is important to be extra cautious with fast fuels. Some vapors can also accumulate and ignite at room temperature in small spaces. This fuel must be kept covered at all times. Exercise caution transporting it in a car trunk where it can expand and potentially explode.
White Gas (Coleman camping fuel or Naphtha): Ignites quickly, burns fast and hot and creates a bright white flame. It is clean burning, creates less air and ground pollution, soot or residue and is fairly safe for indoor use. It can be difficult to extinguish though and it is very volatile. Do not re-dip fire wicks that are still hot, even if no flame is apparent! Finally, fast fuels, being volatile and vaporous, begin to evaporate off wicks immediately after dipping, especially in dry or windy conditions. After even five minutes, you may need to re-dip your wicks.
Zippo or Ronsonol Lighter Fluid (which are also forms of Naphtha): These fast fuels have almost identical characteristics to white gas. Some find these particularly desirable because they come in containers with “squirt tops” and allow one to squirt fuel directly onto a wick, especially a wick that has already been spun off but just prior to lighting up to ensure ignition. This can be particularly helpful when you’re having trouble lighting a slow fuel.
– Mixing Fuels: Lamp Oil and kerosene have the long burn time you want in a fuel but they can be a hassle to light. White gas lights readily but evaporates very quickly. For that reason, many performers prefer a mix. 50% white gas with 50% kerosene lights quickly and burns long. 50% white gas with 50% lamp oil burns even longer with less stink and less smoke.
– DO NOT USE: Charcoal lighter fluid, Mineral spirits, or Gasoline.
Pictures of Fuels:
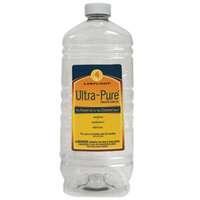
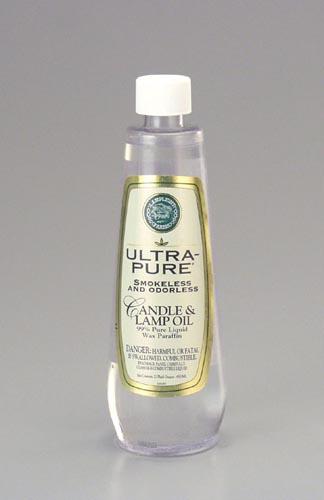
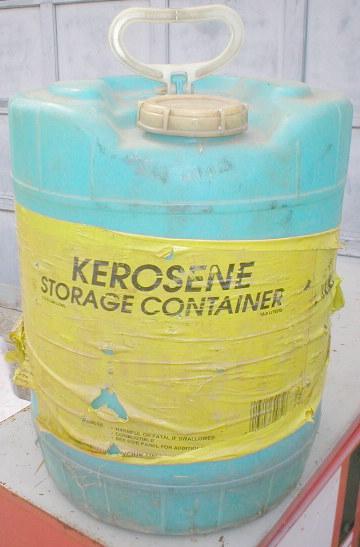
Lamp Oil and Kerosene =Slow Fuels
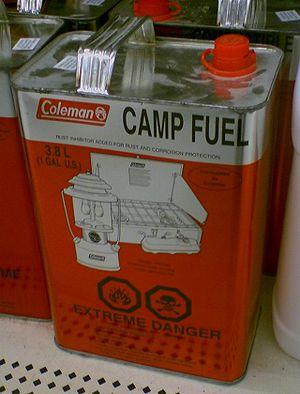
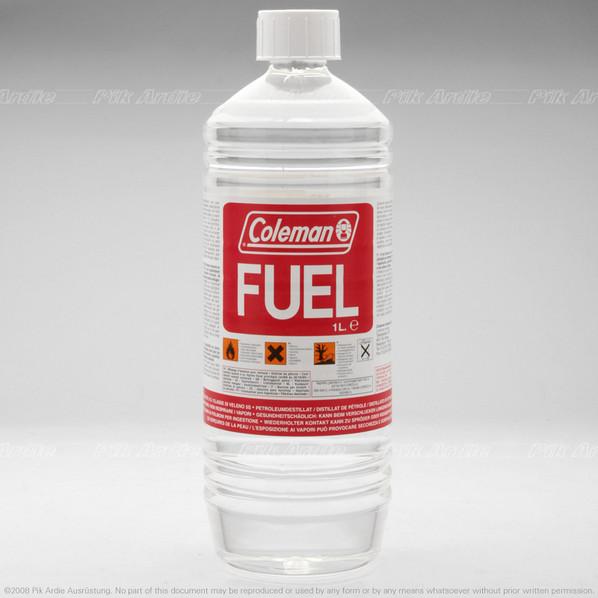
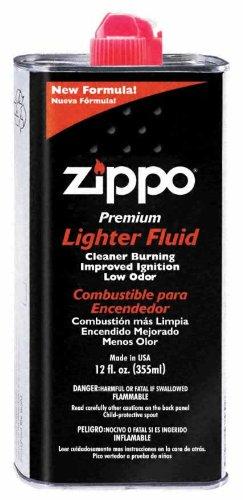
White Gas/Naphtha Camping Fluid, Naphtha Lighter Fluid=Fast Fuels
PART THREE – Emergency First Aid:
– Burns fall into four classifications: first-, second-, third- and fourth-degree burns:
• First-degree burns usually only burn the top layer of skin. These burns tend to appear red, like a sunburn, and although first-degree burns can cause great pain, they seldom result in lasting problems or require medical attention.
• Second-degree burns burn deeper into the skin’s layers and result in blistering or the splitting of the skin’s layers. This injury appears more like a scalding but may also appear wet because of loss of fluid through the damaged skin. Second-degree burns rarely cause lasting problems or scarring but the pain can be intense. HOWEVER, if you have a second-degree burn that is, say, the size of your hand, you can go into shock from fluid loss. Large burns also increase the risk of infection. For second-degree burns larger than a quarter, or burns on the hands, face, nose, mouth, or genitals, it is best to seek medical attention immediately.
• Third-degree burns destroy all layers of the skin and extend into deeper tissue. These burns are usually painless, at least at first, because the nerve endings have been destroyed. If you have a burn that doesn’t hurt, you need to get to a hospital. Pronto! Third-degree burns result in scarring, infection, and fluid loss. Skin grafts are often needed to repair these types of deep burns.
• Fourth-degree burns are burns INSIDE the body such as from inhaling or swallowing chemicals or fire. Call an ambulance, explain what has happened. The person will need intubation and possibly a life-flight. In fire dancing, these injuries are most common from breathing fire when one inhales fire or fuel.
– For most fire dancers, though, burns fall into two more practical categories — Those you can treat yourself and those requiring medical attention.
FOR BURNS YOU CAN TREAT YOURSELF
(the most common burns in fire performance):
• Remove jewelry or clothing from the injured area before it swells
• Flush the burn with cool running water for at least ten minutes or apply cold-water compresses made of a wet towel or handkerchief. Do not use ice or ice water, which can cause more damage to the burned area. Cold water eases the pain and reduces the amount of skin damage because it lowers the temperature of the skin at the site (which is technically still cooking from the increased heat). Apply cold for at least five minutes and up to one hour.
• Take a fever reducer to help get that body temp down! Fever reducers include aspirin, ibuprofen and acetaminophen (Tylenol). It will also help reduce the pain.
• If the burn is on an arm or leg, keep it elevated to reduce swelling.
• If the burn has caused blisters, be careful to avoid breaking or puncturing them. The pain really sets in once a blister is popped! Unfortunately, blisters often break on their own. If they do, allow the overlying skin to remain on the blister. It acts as its own wet dressing, keeping the new skin clean and protected as new skin forms beneath it. (You can also buy wet dressings specifically for burns to keep in your med kit!) Cover the burn with a clean, non-fluffy (preferably gauze) bandage but make sure you do not get tape or adhesive on the burn itself. Once you have a sterile bandage on the injury, leave it alone for at least 24 hours to allow healing to begin. If you find that your bandage has stuck to the wound, don’t pull it off. Soak it off.
• Do not put ointments, grease, petroleum jelly, butter, aloe or any home remedy on the burn, especially during the first 24 hours! These substances hold the heat in, making the burn worse. They can also lead to infection.
• Drink plenty of water and avoid drinking alcohol.
BURNS THAT REQUIRE MEDICAL TREATMENT:
• Follow the instructions above BUT do not remove clothing if it is stuck to the burn!
• Get to the doctor a.s.a.p.! – Tonight, not tomorrow.
• For third degree burns or for second degree burns half the size of the hand involving the hand, foot, face or genitalia or for any burn near the nose or mouth, I strongly suggest calling 911 instead of driving to a doctor. Paramedics can manage airway injuries (from breathing in super heated air) and treat shock. They also carry ring cutters, morphine for pain and can take you directly to a burn center or emergency trauma center for specialized care if necessary. In the case of a catastrophic injury, such as fourth-degree burns, they can also call in a life-flight helicopter. Finally, if you are somewhere unfamiliar, it can be easy to become lost and if time is of the essence, it’s important to have a professional to care for the patient and manage the travel.
FOR COMPLICATIONS AFTER A BURN:
See a doctor immediately for any of the following:
• Fever
• Pus or drainage from the burned area
• Excessive swelling of the burned area
• Increased redness of the skin
• Numbness or coolness of the skin beyond the burned area
• A blister filled with greenish or brownish fluid or one that becomes hot again or turns red
• A burn that doesn’t heal in 10 days to 2 weeks
First Aid Kits should contain:
• Clean gauze bandages stored in sandwich bags
• Aspirin
• A bandana
• A bottle of water
• Burn dressing bandages (the kind with liquid in them, available at any pharmacy)
• An emergency medical flyer to help with remembering how to treat a burn in an emergency.
– Note: You will not find ointments of any kind in my burn kit! You do not want to put any ointment on a burn immediately after the burn!
* Make sure to have a cell phone handy along with the address of your location and clear directions for arriving emergency personnel.
This Safety, Fuel and First Aid Pamphlet was compiled and edited
by Carolyn Louise Mabry
Last Update: February 16, 2020
COMMITMENT TO FIRE SAFETY PLEDGE:
I commit to interact with fire safely.
I commit to be present, sober and capable,
to pre-check my tools and environment before burning,
to store and use fuel safely,
to have a Safety present and Safety for others,
to allow adequate space to protect people and the environment
and to exercise good technique that does not rely on shortcuts.
I commit to Fire Safety:
_______________________________________
(Name)
_______________________________________
(Date)

